Replacing the Image Drum and Toner Cartridge at the Same Time
- Prepare a new image drum and toner cartridge.
- Hold the handle (A) to open the scanner unit.

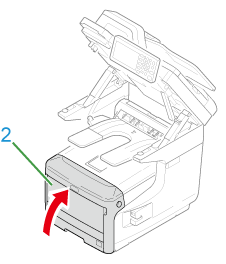
- Insert your finger into the recess (B) on the right side of the machine and pull the front cover open lever (1) to open the front cover (2) forward.
- Press the button (C) and open the Output Tray (3).


- Identify an empty toner cartridge by its label color.
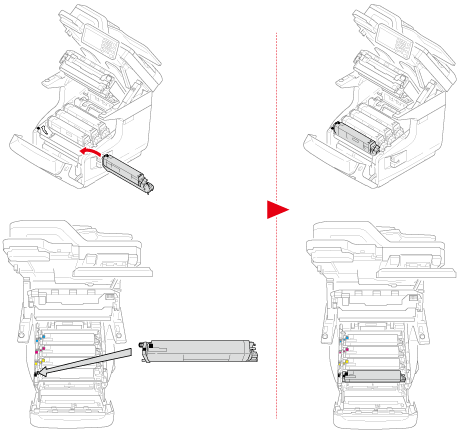
- Remove the image drum (4) from the machine and place it on a flat surface.


- Unpack a new image drum and place it on the flat surface.
- Remove the protective sheets.

- Remove the toner cover.

- Unpack a new toner cartridge.

- Shake the cartridge several times vertically and horizontally.

- Remove the tape (5) from the toner cartridge.

- Insert a new toner cartridge (6) by aligning its left side indentation (7) with the protrusion (8) on the image drum so that the toner cartridge and image drum color label align. Then insert the right side gently into place.

- Turn the blue lever (9) of the toner cartridge backward until its top align on the ▶ mark while pressing the toner cartridge.

-
Check a label color of a new image drum and place the drum into the machine.
- Close the Output Tray (3) by pushing the both sides of the Output Tray (3) firmly.


- Close the front cover (2).
- Hold the handle (A) to close the scanner unit

- Please recycle image drums and toner cartridges.